Thursday, December 16, 2010

Delicious Export HTML: Show Tags

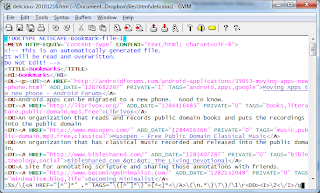
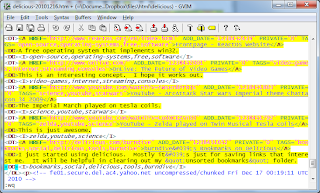
There are rumors going around that Yahoo! is shutting down their Delicious social bookmarking site, and there are already a couple of posts describing how to preserve your bookmarks.  One of the most valuable aspects of bookmarks are your tags, and unfortunately when you export your bookmarks from Delicious, the HTML page that you download doesn't display the tags.

If it did, you would at least be able to open the web page and search for a specific tag.  The tags are there in the HTML source, but they aren't visible on the page.

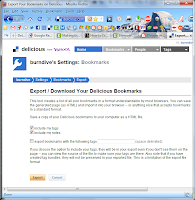
Here's how to modify the page source to make them visible.  First, log in to Delicious, and go to the Export page in Settings.  Download the export file and save it.

Next, open the file in gVim (You can download gVim here).

Enter the following command.  You can either do this by typing it in, or by copying it from this web page (starting after the colon), typing the colon character ":", and then pressing Ctrl+V.  Here's the command:

:%s/\(<A HREF="[^"]*" .* TAGS="\([^"]*\)">[^<]*<\/A>\(\n.*\)\?\)/\1\r<DD><I>\2<\/I>/g


Press Enter.  This will apply the command.

:wq
 Next, save the file and exit gVim.  You can do that with the ":wq" command, but you can also just click the graphical "Save" icon.


Wednesday, December 08, 2010

Twitpic-to-Posterous Script: Another Update

A while ago I wrote a script to import my Twitpic photo posts to Posterous and posted it on this blog.

Even though Posterous now supplies their own working transfer tool, it has its limitations.  One person who tried that tool was unsatisfied, and tried my script.  He really liked the results, but he noticed some drawbacks to my script as well.  Here's what's new in my script v1.3.1:
  • New feature by request - #hashtags and @username mentions are now linked to the appropriate Twitter page in the body of the Posterous post.
  • Fix - issue where Twitpic now truncates the tweet text in the HTML title.  Switched to using the image alt text from the full page.  
  • Fix - Twitpic started escaping single and double quotes in the tweet text, which were showing up uninterpreted in the Posterous titles.  The script now handles them correctly.
  • Other changes
    • Only download the Full images by default (Scaled and thumbnails can be enabled by setting flags.)
    • Print an error message and pause for 5 seconds if a download fails (Twitpic was being unreliable during my testing.)
    • Other miscellaneous fixes and tweaks
Special thanks to @RyanMeray!
  • Update (v1.3.2): better regular expressions for @username and #hashtag formats. 
  • Update (v1.3.4): now optionally adds hashtags as post tags.
You can get the latest version here.

    Wednesday, December 01, 2010

    Dropbox Sync Script

    Recently, I started using Steam, and while Steam can install each of your games on each of your computers, it doesn't keep the game saves in sync.  I wanted to be able to pick up where I had left off on any computer I wanted, not needing to worry about copying over save files, so I turned to Dropbox, which I've been using for a while. 

    I had created a set of batch scripts that I used on Windows to set up the sync folders, but since I was adding several folders, and the number of scripts was getting to be large, I decided to combine them all into a single flexible and streamlined script.  I also decided to make it as generic as possible, so that other people could use it with minimal fuss.  Basically the script has a function that moves files and folders located outside of the Dropbox folder inside, and then creates a symlink (or folder junction), so that the program accessing the files doesn't need to be reconfigured in order to keep accessing the files.  If the item is already in the Dropbox folder, the original is kept under a different name, and a link is created to the existing synced content.  If the item doesn't exist in either place, it gets created in Dropbox, and linked to in the specified location.

    The script is populated with things that I want synced, which will probably be different from what you want to sync, but it should be a simple matter to change that.  If you add items, the script is set up so that you can re-run it without creating more and more symlinks.

    It's worth noting that the mklink command requires Windows Vista or later.  If you're running an earlier version such as XP, it will use the linkd command, which comes with the Windows 2003 Resource Kit. (You don't need to be running 2003 to install it.)

    So, without further ado, here is the script:
    @echo off
    :: This script creates symlinks (NTFS junctions) in order to sync the contents via Dropbox
    :: Some of these items require Administrator privileges to execute because of where the items are located.
    
    :: Copyright 2010 Tim "burndive" of http://burndive.blogspot.com/ and http://tuxbox.blogspot.com/
    :: This software is licensed under the Creative Commons GNU GPL version 2.0 or later.
    :: License informattion: http://creativecommons.org/licenses/GPL/2.0/
    :: This script was obtained from here:
    :: http://tuxbox.blogspot.com/2010/12/dropbox-sync-script.html
    
    :: Set this to your Steam user ID
    set STEAM_USER=burndive
    
    :: The path to your Documents folder
    set DOCUMENTS=%USERPROFILE%\My Documents
    if exist "%USERPROFILE%\Documents" (
      set DROPBOX=%USERPROFILE%\Documents
    )
    
    :: The path to your Dropbox folder
    set DROPBOX=%DOCUMENTS%\My Dropbox
    if exist "%USERPROFILE%\Dropbox" (
      set DROPBOX=%USERPROFILE%\Dropbox
    )
    
    :: Determine which command to use for making Folder Junctions
    ver | findstr "5." > nul
    if errorlevel 1 (
      :: This requires Windows Vista or later
      set JUNCTION_CMD=mklink /j
    ) else (
      :: This requires the Windows 2003 Resource Kit Tools
      set JUNCTION_CMD=linkd
    )
    
    :: Find the correct Flash SharedObjects folder name if localhost subfolder exists
    set FLASH_LOCAL=
    for /F "tokens=*" %%I in ('dir /b "%APPDATA%\Macromedia\Flash Player\#SharedObjects"') do (
      if exist "%APPDATA%\Macromedia\Flash Player\#SharedObjects\%%I\localhost" (
        set FLASH_LOCAL=%APPDATA%\Macromedia\Flash Player\#SharedObjects\%%I\localhost
      )
    )
    
    ::::::::::::::::::::::::::::::::::::::::::::::::::::::::::::::::::
    :: The following items require only User privileges to execute
    ::::::::::::::::::::::::::::::::::::::::::::::::::::::::::::::::::
    
    :: Make localhost Flash Shared Objects dir architecture neutral
    if not "%FLASH_LOCAL%" == "" (
      if exist "%FLASH_LOCAL%\Program Files (x86)" (
        call:LinkFolder "%FLASH_LOCAL%", "Program Files", "%FLASH_LOCAL%\Program Files (x86)"
      )
    )
    
    :: Digital Blasphemy wallpapers
    call:LinkFolder "%USERPROFILE%\Pictures\wallpaper", "db-fs", "%DROPBOX%\images\digital-blasphemy\db-fs"
    call:LinkFolder "%USERPROFILE%\Pictures\wallpaper", "db-ws", "%DROPBOX%\images\digital-blasphemy\db-ws"
    call:LinkFolder "%USERPROFILE%\Pictures\wallpaper", "db-preview", "%DROPBOX%\images\digital-blasphemy\db-preview"
    
    :: Images
    call:LinkFolder "%USERPROFILE%\Pictures", "images", "%DROPBOX%\images"
    
    :: Pidgin Instant Messenger
    call:LinkFolder "%APPDATA%\.purple", "icons", "%DROPBOX%\app-files\pidgin\icons"
    call:LinkFolder "%APPDATA%\.purple", "logs", "%DROPBOX%\app-files\pidgin\logs"
    
    :: DVRMSToolbox Commercials XML files
    call:LinkFolder "%PUBLIC%\DvrmsToolbox", "CommercialsXml", "%DROPBOX%\app-files\CommercialsXml"
    
    ::::::::::::::::::::::
    :: Humble Bundle Games
    ::::::::::::::::::::::
    :: Penumbra Overture
    call:LinkFolder "%DOCUMENTS%\Penumbra Overture\Episode1", "save", "%DROPBOX%\app-files\game-saves\penumbra-overture"
    :: Samarost2 : TODO
    :: World of Goo
    call:LinkFolder "%LOCALAPPDATA%\2DBoy", "WorldOfGoo", "%DROPBOX%\app-files\game-saves\world-of-goo"
    :: Aquaria : TODO
    :: Gish : TODO
    :: Lugaru : TODO
    
    ::::::::::::::::::::::::
    :: Humble Bundle 2 Games
    ::::::::::::::::::::::::
    :: Braid
    call:LinkFolder "%APPDATA%", "Braid", "%DROPBOX%\app-files\game-saves\braid"
    :: Machinarium
    if not "%FLASH_LOCAL%" == "" (
      if exist "%FLASH_LOCAL%\Program Files" (
        call:LinkFolder "%FLASH_LOCAL%\Program Files\Machinarium", "machinarium.exe", "%DROPBOX%\app-files\game-saves\machinarium"
      )
    )
    :: Osmos
    call:LinkFolder "%DOCUMENTS%", "Osmos", "%DROPBOX%\app-files\game-saves\osmos"
    :: Cortex Command : TODO
    :: Revenge of the Titans HIB
    call:LinkFolder "%USERPROFILE%\Revenge of the Titans 1.71", "slots", "%DROPBOX%\app-files\game-saves\revenge-of-the-titans-1.71"
    call:LinkFolder "%USERPROFILE%\Revenge of the Titans 1.72", "slots", "%DROPBOX%\app-files\game-saves\revenge-of-the-titans-1.72"
    
    ::::::::::::::::::::::::::::::::::::::::::::::::::::::::::::::::::
    :: The following items require Administrator privileges to execute
    ::::::::::::::::::::::::::::::::::::::::::::::::::::::::::::::::::
    
    :: Eclipse workspace
    call:LinkFolder "%USERPROFILE%", "workspace", "%DROPBOX%\app-files\workspace"
    
    :: gVim config file
    call:LinkFile "%USERPROFILE%", "_gvimrc", "%DROPBOX%\config\windows\_gvimrc"
    
    :: Steam Game save folders
    if exist "%PROGRAMFILES(X86)%" (
      :: Note: The caret is an escape character
      set STEAM_DIR=C:\Program Files ^(x86^)\Steam\steamapps
    ) else (
      set STEAM_DIR=%PROGRAMFILES%\Steam\steamapps
    )
    call:LinkFolder "%STEAM_DIR%\%STEAM_USER%\half-life 2\hl2", "SAVE", "%DROPBOX%\app-files\game-saves\half-life-2-steam"
    call:LinkFolder "%STEAM_DIR%\%STEAM_USER%\half-life 2 episode one\episodic", "SAVE", "%DROPBOX%\app-files\game-saves\half-life-2-ep1-steam"
    call:LinkFolder "%STEAM_DIR%\%STEAM_USER%\half-life 2 episode two\ep2", "SAVE", "%DROPBOX%\app-files\game-saves\half-life-2-ep2-steam"
    call:LinkFolder "%STEAM_DIR%\%STEAM_USER%\half-life 2 lostcoast\lostcoast", "SAVE", "%DROPBOX%\app-files\game-saves\half-life-2-lostcoast-steam"
    call:LinkFolder "%STEAM_DIR%\%STEAM_USER%\portal\portal", "SAVE", "%DROPBOX%\app-files\game-saves\portal-steam"
    
    :: Pause so the user can review output
    pause
    
    :: End of execution
    goto:eof
    
    ::::::::::::
    :: Functions
    ::::::::::::
    
    :LinkFolder
    setlocal
    :: Arguments
    set LINK_PATH=%~1
    set LINK_NAME=%~2
    set TARGET=%~3
    ::echo Link: %LINK_PATH%\%LINK_NAME%
    ::echo Target: %TARGET%
    
    if not exist "%LINK_PATH%" (
      mkdir "%LINK_PATH%"
    )
    cd "%LINK_PATH%"
    :: If the folder is already a link, just delete it
    dir | findstr /i "%LINK_NAME%" | findstr "<JUNCTION>" > NUL
    if not errorlevel 1 (
      rmdir "%LINK_NAME%"
    )
    if exist "%LINK_NAME%" (
      if exist "%TARGET%" (
        echo Backing up conflicting copy
        move "%LINK_NAME%" "%LINK_NAME%-orig"
      ) else (
        :: Move the original if target does not exist
        echo Moving original folder to link location
        echo move "%LINK_NAME%" "%TARGET%"
        move "%LINK_NAME%" "%TARGET%"
      )
    ) else (
      if not exist "%TARGET%" (
        :: If neither exist, create target
        echo Creating target folder
        mkdir "%TARGET%"
      )
    )
    %JUNCTION_CMD% "%LINK_NAME%" "%TARGET%"
    
    endlocal
    goto:eof
    
    :LinkFile
    setlocal
    :: Arguments
    set LINK_PATH=%~1
    set LINK_NAME=%~2
    set TARGET=%~3
    ::echo Link: %LINK_PATH%\%LINK_NAME%
    ::echo Target: %TARGET%
    
    if not exist "%LINK_PATH%" (
      mkdir "%LINK_PATH%"
    )
    cd "%LINK_PATH%"
    :: If the folder is already a link, just delete it
    dir | findstr /i "%LINK_NAME%" | findstr "<SYMLINK>" > NUL
    if not errorlevel 1 (
      del "%LINK_NAME%"
    )
    if exist "%LINK_NAME%" (
      if exist "%TARGET%" (
        echo Backing up conflicting copy
        move "%LINK_NAME%" "%LINK_NAME%-orig"
      ) else (
        :: Move the original if target does not exist
        echo Moving original file to target location
        move "%LINK_NAME%" "%TARGET%"
      )
    ) else (
      if not exist "%TARGET%" (
        :: If neither exist, create target
        echo Creating empty target file
        echo "" > "%TARGET%"
      )
    )
    :: linkd will not work for files, only folders
    mklink "%LINK_NAME%" "%TARGET%"
    
    endlocal
    goto:eof
    CC-GNU GPL
    This software is licensed under the CC-GNU GPL version 2.0 or later.

    PS: If you use my code, I appreciate comments to let me know, and any feedback you may have, especially if it's not working right for you, but also just to say thanks.

    For convenience, you can download this script from my server.

    Thursday, November 11, 2010

    Trying VirtualBox

    In my last post, I compared Windows VirtualPC to VMWare Player.  I thought I would also try out Oracle's VirtualBox to see how it stacks up against the other two.

    VirtualBox is in many ways very similar to VirtualPC.  When you launch VirtualBox, you get a management window with your virtual machines in a column on the left, and configuration options on the right.  From there, you can launch them in a separate window.

    The integration tools install in the same manner as the other two (virtual CD-ROM with auto-run installer).

    One problem I ran into was that at first I couldn't take screenshots of just the VirtualBox VM window using Alt+Print Screen.  This is because the VM was capturing my keystrokes when the window was selected.  To fix this, I needed to disable the "Auto Capture Keyboard" setting under File -> Preferences | Input.  Once that was configured I was able to take screenshots without problem.  Interaction isn't seamless with this setting, but I actually prefer this for my purpose, which is to run old games, because then there's no danger of scrolling off of the screen.

    I like the default escape key of right Ctrl, since it's easy to find with my finger whether my fingers are using the keyboard or the touchpad of my laptop.

    In order to get a cool screenshot, I attempted to load all three of the VMs: VirtualPC, VMWare, and VirtualBox.  I was able to launch the first two, but then VirtualBox wouldn't load the VM because it couldn't get full control of the CPU the way it wanted, and my PC slowed to a crawl.  I think this was because of the amount of RAM I had allocated to the clients, but also running two different kinds of VM is probably a bad idea.  I know I can run two VMWare VMs without problem, so I think it's just the host programs that conflict, and not the fact that there was more than one of them.

    Anyway, I think VirtualBox is an excellent choice.  Mouse performance was just as good as VirtualPC, and since it's an open source product, they have no reason to hold back full features like snapshots that aren't supported anymore in VirtualPC and that VMWare reserves for its Workstation product.

    Because of these extra features, I would recommend VirtualBox over VirtualPC and VMWare Player.


    Tuesday, October 19, 2010

    VMWare and Virtual PC: Playing Age of Empires on Windows 7

    Recently, I decided to install Age of Empires on my computers.  The game came up in a conversation with someone who periodically hosts AOE parties.  Anyway, it was one of the few PC games I played growing up, and also one that my wife used to play.  When I got home, I discovered that, indeed, I did still have the original discs for Age of Empires, the Age of Kings Expansion, and Age of Emprires II.  I believe my sister salvaged them for me from the boxes left when my parents moved from a house to an apartment.

    In any case, I had the software that I needed, so I installed it on my wife's PC running Windows XP.  That done, I had a couple of old PCs running Windows 2000, but those are on the same KVM with my wife's PC, so they couldn't be used for multi-player.  The problem was Windows 7.  I had heard that it wouldn't be pretty (you have to shut down Explorer to play), so I decided to virtualize.  That way, I wouldn't need to give up any part of Windows 7, even Aero, and it would run seamlessly.

    I had used VMWare before, so that's what I started with.  VMWare Player is free to download, and so I did.  The installation went pretty smoothly.  I chose to install the option to install the OS using the VMWare wizard, which turned out to be a problem later on when I had to manually eject the virtual floppy drive in order to be able to install VMWare Tools (VMWare thought that the OS installation wasn't complete, when it was.)  Next time, I'll choose the option to install the OS after creating a blank virtual machine.

    After installing the OS (I used the original XP that came with my laptop), I updated to SP3, and then had Windows Update install all of the latest patches.  Once everything was updated, I installed the Age of Empires games and applied the appropriate patches.  I also created a small subset in my list of software suitable for a minimalist virtual machine. 

    After that, I was good to go, so my wife and I fired up the game and played a few matches.  We had to brush up on our skills first, but it didn't take us long to get back into the swing of things.

    I used Bridged mode for networking, but even so, I had to disable Windows Firewall on the XP VM in order to host an AOE game, even after creating a firewall exception, and expanding it to the whole subnet.


    Of course, it wasn't perfect.  Even though I had VMWare Tools installed, the mouse was a bit unresponsive, and VMWare Player tends to release the mouse if you cross the edge of the screen.  For this reason, and because I also wanted to try another option for virtualization that I hadn't used before, I decided to also try out Virtual PC. 

    It took some doing to find the download link for the latest version of Virtual PC.  I think that Microsoft doesn't want anyone running Windows 7 Home Premium (which is what I have on my laptop) to find the file.  I kept being redirected to Microsoft Virtual PC 2007, which is the appropriate version if your host operating system is Windows XP or Vista, or to upgrade to Windows 7 Professional or Ultimate.  I finally found the right link for Windows Virtual PC, which only supports Windows 7 as a host OS.  This is also the basis of Windows 7's Windows XP Mode.  Indeed, when I installed Windows Virtual PC on my Windows 7 Home Premium, it created a link in the Start Menu for Windows XP Mode.

    The link doesn't work (it only displays a message that it won't work in this edition of Windows), and the only other item in the Windows Virtual PC start menu folder opens a folder.  At first, I couldn't figure out how to create a virtual machine in this folder, but then I noticed the bar at the top of the folder window.  When I created a new virtual machine, it stored only a small data file in that folder, with the virtual disk files buried out of sight in my hidden AppData folder.  This approach is different from that of VMWare, and it reflects the fact that Microsoft does not expect me to move this VM, back it up, or access its underlying files.  It's supposed to "just work", and I'm supposed to treat this small VMCX file as a proxy for the whole VM.  With VMWare, I can easily move or back up the VM by moving or copying the folder containing all of its files: to a different drive, or even a different machine. 

    Windows Virtual PC with the Integration Tools installed has almost perfect mouse movement, which is essential for playing a real-time strategy game such as AOE.  It wasn't difficult to get used to hitting Ctrl+Alt+Left to escape input capture, instead of VMWare's Ctrl+Alt.


    I do have a license for Windows 7 Ultimate, so I would like to check out Windows XP Mode.  However, this license is currently installed on our living room media PC.  It will take a few hours to set up, so it will probably have to be a free afternoon on a weekend.  If I installed the key currently on my laptop on the media PC, I might be able to use "Anytime Upgrade" to install the newly-unused Ultimate key to my laptop without doing a re-install.  We'll see.

    Tuesday, October 05, 2010

    My Take on Windows Live Essientials

    Microsoft just released their Live Essentials suite of software downloads for Vista and Windows 7 machines.  I've been using them since January 2009.  Here are my thoughts.

    You shouldn't install them all, first of all.  When you download and run the installer, you get the choice to install everything, or pick and choose.  Make the latter selection.  If you have a previous version of something, they won't give you the choice not to upgrade, so if there's something you don't want to install, quit the installer and uninstall it first.
    Which programs in particular to install will be an individual choice.  I already had Mail, Writer, Photo Gallery, and Windows Live Mesh installed from the beta.  I had installed Microsoft Office since last updating the software, and so the installer offered me the "Outlook Connecter Pack".  I'm not sure what it is, but it probably won't hurt.

    Speaking of hurt, though, unless you really, really want it, don't install the Bing Bar.  It's just a bad idea.  It will try to take over all of your browsers, and seriously, who needs a toolbar in their browser? 
     
    I've never tried the updated Messenger, Messenger Companion, or Family Safety.  I hardly ever use my hotmail account to chat, and I use Pidgin when I do, so I don't really have a use for the Messenger enhancements.

    Writer is apparently a very good blogging tool that works with a lot of popular blogging sites (like Blogger, which hosts this blog), but so far, I've stuck with the web interface for composition.
    By far the most useful tool is Windows Live Mesh.  If you're like me, you have a bunch of pictures, music, files, and other documents on various computers.  The file sets are simply too large to fit into a free Dropbox account, and you don't really need access to them over the web, at least not most of them, you just want them on your various computers.  It's a hassle to keep all of photos or music organized in more than one place, so you don't.  You keep them organized in one place, and (hopefully) make periodic backups to another computer just in case. Well, Live Mesh allows you to keep it organized the way you want it, everywhere you want it, and it doesn't matter how big the files are, because Microsoft isn't going to store any of them (except for a special 5GB folder, which it will store in the cloud and allow you to access from anywhere on the web.)

    Microsoft doesn't upload your files to its servers, but it does keep track of them for you.  Any change you make to your shared folders gets copied to the other computers where that folder is synced, and the copying is peer-to-peer, so if you're at home, it happens at the speed of your home network.  It will also keep your files in sync even if you're not at home, directly from your other computer, not through their servers.

    The management interface is pretty simple, though it's easy to miss the "Remote" settings, which allow you to connect to your computer over the Internet if you have enabled it on that device.  Connect is a lot like Remote Desktop, if you're familiar with that.  Basically, it's just like you're sitting at the other computer.  You have to be running MSIE on the computer you're connecting from.

    The web interface is a lot like the desktop interface, except in addition to your shared folders, you also have access to all of your devices as well, and you can see which devices sync to each of your folders.

    Update:  After installing  Windows Live Mesh on my wife's new netbook, she experienced extremely slow performance.  Her netbook has a 2GHz x64 processor and 2GB of ram, so it wasn't simply the fact that it was a netbook that was making it slow.  I opened Task Manager, and found that the MOE process ("Mesh Operating Environment") was consistently taking up 40 - 60% of the CPU.  I shut down the process, and deleted the "Run" entry from the registry to disable it starting up automatically.  Any syncing that happens will need Live Mesh to be started manually.  I also observed similar behavior on my laptop, but the media PC (which is on all the time) has the MOE process taking only 3 - 5% of the CPU.  It's probably checking the synced files for updates every time it starts up.

    Anyway, be warned: Windows Live Mesh is a resource hog on machines that need to turn on and off all the time.

    Friday, September 10, 2010

    The Cure For Vista Media Center's Insomnia

    At home we have a computer hooked up to our TV.  It has two TV tuners, and is set up with Windows 7 Media Center to record our favorite television shows (and automatically detect and skip commercials).  It's wonderful.  We can also watch Blu-ray movies, access Netflix, Hulu, Amazon Unbox, and any number of other streaming services right from our living room TV. 

    This post is not about that computer.  This post is about my laptop.  Occasionally, when traveling, or when simply in another room of the house, I like to use Windows Media Center on my laptop.  Currently, it's running Windows Vista, so in order to be able to view shows in the .wtv format used by Windows 7's Media Center, I have installed the "TV Pack" unofficially leaked by Microsoft.

    It works great.  Basically, I browse to the file I want to watch on a shared drive (I have a shortcut to the Recorded TV folder on the desktop), double-click it, and it plays on the laptop.  The commercial scan files are automatically synced. When traveling, I usually copy what I want to watch to my Laptop's hard drive, but there's also this.

    So, what's the problem?  My laptop won't sleep.  Or hibernate.  At least not all night.  It wakes up at 3:30 AM to download the latest TV listings, even though I never configured it to work with a tuner, so it has no listings to download.  Needless to say, this is annoying.  It drains my battery unnecessarily, and if it's in its case, there's a danger that it will overheat.

    After living with this problem, usually dealing with it by shutting the laptop down every time I stop using it--which means a cold boot every time I start using it, and it takes a while to load everything up--I finally found the solution to my problem.  Step 9 on this page points you in the right direction, but here's how you do it:

    Launch the Task Scheduler.  You can do this by opening the Start Menu, typing "Task Scheduler", and pressing Enter.  You will get a UAC prompt, which you should authorize. 

    In the left pane, click on the arrows left of the text to expand down to the following item: Task Scheduler (Local) -> Task Scheduler Library -> Microsoft -> Windows -> Media Center


    Once you have selected Media Center, look on the top middle pane for a task named mcupdate_scheduled.  Double-click this task to load the Properties window.


    In the Properties window, click the Conditions tab, and uncheck the box next to "Wake the computer to run this task".

    Click OK, and close Task Scheduler.  That's it.  No more waking up from hibernate or sleep in the middle of the night!

    Friday, July 16, 2010

    TwitPic to Posterous Export Script: Update

    In the time since I wrote my script which downloads all of a user's TwitPic posts (text included) and uploads them as Posterous posts, Posterous has come out with their own import tool.

    However, as noted in their blog post, TwitPic is currently blocking Posterous' servers, so someone came along and tried to use my script.  It turned out that the TwitPic site had been updated, and my script no longer worked.

    Well, I updated the script so that it works again.  The script can be found here.

    Wednesday, March 17, 2010

    TwitPic to Posterous Export Script

    Note: This post (and the script it contains) has been updated as of December 14, 2010.  (v1.4.0) The script can also be downloaded from my server here.
    Also, Posterous has done a lot of work on solving this problem since I wrote my script.   You can see their latest solutions here.

    Recently, I switched from TwitPic to Posterous as my method of posting phone pictures (and now video) to the Internet.  But since I switched, I didn't want to have my data history split in two, so I decided to write a script to download each of my TwitPic images with their associated text and date, and upload them to Posterous with the same information.

    Initially, I wanted to make one long post with all of the images, and their text below.  However, with the Posterous API, it isn't possible to refer to a specific image in your body text, so individual posts is the way I went.

    Along the way, I became familiar with yet another Linux command: curl.

    I love that Posterous has an API that (once you figure out curl) is pretty easy to use.  TwitPic, on the other hand, has absolutely zero support for exporting anything.  The fact that they're so non-user-centric and out-dated was a driving force in my switching.  The only reason I hadn't switched to img.ly already was because img.ly has a bug that prevents images sent from my phone from being posted, since my phone sends them without a file extension.  I worked with their tech support for a while, but they didn't fix it.  I got a new phone, but it was also a Samsung, and it did the same thing with images.  Oh, well.  Posterous is better.

    Anyway, here is the script:

    First run it with just the first two arguments, and it will download all of your TwitPic data, including thumbnail images.  Once you're satisfied, supply your Posterous User ID, Password, and Site ID.  (If you don't know your Site ID, run the script with your Posterous User ID, Password, and no Site ID, and it will query your Posterous site info as long as your Posterous credentials are valid.)

    Note: if you want to run this from Windows, you should install Cygwin (with, at a mimum, curl and sed) and run it from there.

    ./twitpic-to-posterous.sh [twitpic-id] [working-dir] [postrous-id] [posterous-password] [posterous-site-id] [skip-number]
    #!/bin/sh
    
    # Copyright 2010 Tim "burndive" of http://burndive.blogspot.com/ and http://tuxbox.blogspot.com/
    # This software is licensed under the Creative Commons GNU GPL version 2.0 or later.
    # License informattion: http://creativecommons.org/licenses/GPL/2.0/
    
    # This script was obtained from here:
    # http://tuxbox.blogspot.com/2010/03/twitpic-to-posterous-export-script.html
    
    RUN_DATE=`date +%F--%H-%m-%S`
    SCRIPT_VERSION_STRING="v1.4.0"
    
    TP_NAME=$1
    WORKING_DIR=$2
    P_ID=$3
    P_PW=$4
    P_SITE_ID=$5
    UPLOAD_SKIP=$6
    
    # Comma separated list of tags to apply to your posts
    P_TAGS="twitpic"
    # Whether or not to auto-post from Posterous
    P_AUTOPOST=0
    # Whether or not the Posterous posts are marked private
    P_PRIVATE=0
    
    # This is the default limit of the number of posts that can be uploaded per day
    P_API_LIMIT=50
    
    DOWNLOAD_FULL=1
    DOWNLOAD_SCALED=0
    DOWNLOAD_THUMB=0
    PREFIX=twitpic-$TP_NAME
    HTML_OUT=$PREFIX-all-$RUN_DATE.html
    UPLOAD_OUT=posterous-upload-$P_SITE_ID-$RUN_DATE.xml
    
    if [ -z "$TP_NAME" ]; then
      echo "You must supply a TP_NAME."
      exit
    fi
    if [ ! -d "$WORKING_DIR" ]; then
      echo "You must supply a WORKING_DIR."
      exit
    fi
    if [ -z "$UPLOAD_SKIP" ]; then
      UPLOAD_SKIP=0
    fi
    UPLOAD_SKIP_DIGITS=`echo $UPLOAD_SKIP | sed -e 's/[^0-9]//g'`
    if [ "$UPLOAD_SKIP" != "$UPLOAD_SKIP_DIGITS" ]; then
      echo "Invalid UPLOAD_SKIP: $UPLOAD_SKIP"
      exit
    fi
    
    cd $WORKING_DIR
    
    if [ -f "$HTML_OUT" ]; then
      rm -v $HTML_OUT
    fi
    
    # If Posterous username and password were supplied, but not site ID, query the server and exit.
    P_SITE_INFO_FILE=posterous-$P_SITE_ID.out
    if [ ! -z "$P_ID" ] && [ ! -z "$P_PW" ] && [ -z "$P_SITE_ID" ]; then
      echo "Getting Posterous account info..."
      curl -u "$P_ID:$P_PW" "http://posterous.com/api/getsites" -o $P_SITE_INFO_FILE
      SITE_ID_RET=`grep "<id>$P_SITE_ID</id>" $P_SITE_INFO_FILE`
      if [ -z "$SITE_ID_RET" ]; then
        echo "Please supply your Posterous Site ID as the fifth argument."
        echo "Here is the response from the Posterous server.  If you entered correct credentials, you should see your Site ID(s):"
        cat $P_SITE_INFO_FILE | tee -a $UPLOAD_OUT
        exit
      fi
    fi
    
    # Confirm that we have a valid Posterous Site ID
    if [ ! -z "$P_SITE_ID" ]; then
      echo "Getting Posterous account info..."
      curl -u "$P_ID:$P_PW" "http://posterous.com/api/getsites" -o $P_SITE_INFO_FILE
      SITE_ID_RET=`grep "<id>$P_SITE_ID</id>" $P_SITE_INFO_FILE`
      if [ -z "$SITE_ID_RET" ]; then
        echo "Make sure that you have supplied a valid Posterous Site ID as the fifth parameter.  If you don't know your Site ID, leave it out, and this script will query the server."
        echo "Here is the response from the Posterous server.  If you entered correct credentials, you should see your site ID(s):"
        cat $P_SITE_INFO_FILE | tee -a $UPLOAD_OUT
        exit
      fi
    fi
    
    MORE=1
    PAGE=1
    while [ $MORE -ne 0 ]; do
      echo PAGE: $PAGE
      FILENAME=$PREFIX-page-$PAGE.html
      if [ ! -s $FILENAME ]; then
        wget http://twitpic.com/photos/${TP_NAME}?page=$PAGE -O $FILENAME
        if [ ! -s "$FILENAME" ]; then
          echo "ERROR: could not get $FILENAME" | tee -a $LOG_FILE
          sleep 5
        fi
      fi
      if [ -z "`grep "More photos &gt;" $FILENAME`" ]; then
        MORE=0
      else
        PAGE=`expr $PAGE + 1`
      fi
    done
    
    ALL_IDS=`cat $PREFIX-page-* | grep -Eo "<a href=\"/[a-zA-Z0-9]+\">" | grep -Eo "/[a-zA-Z0-9]+" | grep -Eo "[a-zA-Z0-9]+" | sort -r | xargs`
    
    # For Testing
    #ALL_IDS="1kdjc"
    
    COUNT=0
    LOG_FILE=$PREFIX-log-$RUN_DATE.txt
    
    echo $ALL_IDS | tee -a $LOG_FILE
    
    for ID in $ALL_IDS; do
      COUNT=`expr $COUNT + 1`
      echo $ID: $COUNT | tee -a $LOG_FILE
    
      echo "Processing $ID..."
      FULL_HTML=$PREFIX-$ID-full.html
      if [ ! -s "$FULL_HTML" ]; then
        wget http://twitpic.com/$ID/full -O $FULL_HTML
        if [ ! -s "$FULL_HTML" ]; then
          echo "ERROR: could not get FULL_HTML for $ID" | tee -a $LOG_FILE
          sleep 5
        fi
      fi
      TEXT=`grep "<img src=" $FULL_HTML | tail -n1 | grep -oE "alt=\"[^\"]*\"" | sed \
            -e 's/^alt="//'\
            -e 's/"$//'\
            -e "s/&#039;/'/g"\
            -e 's/&quot;/"/g'\
            `
      if [ "$TEXT" = "" ]; then
        TEXT="Untitled"
      fi
      echo "TEXT: $TEXT" | tee -a $LOG_FILE
      # Recognize hashtags and username references in the tweet
      TEXT_RICH=`echo "$TEXT" | sed \
            -e 's/\B\@\([0-9A-Za-z_]\+\)/\@<a href="http:\/\/twitter.com\/\1">\1<\/a>/g' \
            -e 's/\#\([0-9A-Za-z_-]*[A-Za-z_-]\+[0-9A-Za-z_-]*\)/<a href="http:\/\/twitter.com\/search\?q\=%23\1">\#\1<\/a>/g' \
            `
      echo "TEXT_RICH: $TEXT_RICH" | tee -a $LOG_FILE
    
      # Convert hashtags into post tags
      P_TAGS_POST=$P_TAGS`echo "$TEXT" | sed \
            -e 's/\#\([^A-Za-z_-]\)*\B//g' \
            -e 's/^[^\#]*$//g' \
            -e 's/[^\#]*\(\#\([0-9A-Za-z_-]*[A-Za-z_-]\+[0-9A-Za-z_-]*\)\)[^\#]*\(\#[0-9]*\B\)*/,\2/g' \
            `
      # Uncomment if you don't want hashtags converted into post tags
      #P_TAGS_POST=$P_TAGS
    
      # Add custom tags from a file (optional).  The file is formatted like this:
      # ,tag1,tag2,tag3
      TAGS_FILE=$PREFIX-$ID-tags-extra.txt
      if [ -s "$TAGS_FILE" ]; then
        P_TAGS_POST=$P_TAGS_POST`cat $TAGS_FILE`
      fi
      echo "P_TAGS_POST: $P_TAGS_POST" | tee -a $LOG_FILE
    
      TEXT_FILE=$PREFIX-$ID-text.txt
      if [ ! -s $TEXT_FILE ]; then
        echo "$TEXT" > $TEXT_FILE
      fi
      FULL_URL=`grep "<img src=" $FULL_HTML | grep -Eo "src=\"[^\"]*\"" | grep -Eo "http://[^\"]*"`
      echo "FULL_URL: $FULL_URL" | tee -a $LOG_FILE
    
      SCALED_HTML=$PREFIX-$ID-scaled.html
      if [ ! -s "$SCALED_HTML" ]; then
        wget http://twitpic.com/$ID -O $SCALED_HTML
        if [ ! -s "$SCALED_HTML" ]; then
          echo "ERROR: could not get SCALED_HTML for $ID" | tee -a $LOG_FILE
          sleep 5
        fi
      fi
      SCALED_URL=`grep "id=\"photo-display\"" $SCALED_HTML | grep -Eo "http://[^\"]*" | head -n1`
      echo "SCALED_URL: $SCALED_URL" | tee -a $LOG_FILE
      POST_DATE=`grep -Eo "Posted on [a-zA-Z0-9 ,]*" $SCALED_HTML | sed -e 's/Posted on //'`
      echo "POST_DATE: $POST_DATE" | tee -a $LOG_FILE
    
      THUMB_URL=`cat $PREFIX-page-* | grep -E "<a href=\"/$ID\">" | grep -Eo "src=\"[^\"]*\"" | head -n1 | sed -e 's/src=\"//' -e 's/\"$//'`
      echo "THUMB_URL: $THUMB_URL" | tee -a $LOG_FILE
    
      EXT=`echo "$FULL_URL" | grep -Eo "[a-zA-Z0-9]+\.[a-zA-Z0-9]+\?" | head -n1 | grep -Eo "\.[a-zA-Z0-9]+"`
      if [ -z "$EXT" ]; then
        EXT=`echo "$FULL_URL" | grep -Eo "\.[a-zA-Z0-9]+$"`
      fi
      echo "EXT: $EXT"
      if [ "$DOWNLOAD_FULL" -eq 1 ]; then
        FULL_FILE="$PREFIX-$ID-full$EXT"
        if [ ! -s $FULL_FILE ]; then
          wget "$FULL_URL" -O $FULL_FILE
          if [ ! -s "$FULL_FILE" ]; then
            echo "ERROR: could not get FULL_URL for $ID: $FULL_URL" | tee -a $LOG_FILE
            sleep 5
          fi
        fi
      fi
      if [ "$DOWNLOAD_SCALED" -eq 1 ]; then
        SCALED_FILE=$PREFIX-$ID-scaled$EXT
        if [ ! -s $SCALED_FILE ]; then
          wget "$SCALED_URL" -O $SCALED_FILE
          if [ ! -s "$SCALED_FILE" ]; then
            echo "ERROR: could not get SCALED_URL for $ID: $SCALED_URL" | tee -a $LOG_FILE
            sleep 5
          fi
        fi
      fi
      if [ "$DOWNLOAD_THUMB" -eq 1 ]; then
        THUMB_FILE=$PREFIX-$ID-thumb$EXT
        if [ ! -s $THUMB_FILE ]; then
          wget "$THUMB_URL" -O $THUMB_FILE
          if [ ! -s "$THUMB_FILE" ]; then
            echo "ERROR: could not get THUMB_URL for $ID: $THUMB_URL" | tee -a $LOG_FILE
            sleep 5
          fi
        fi
      fi
    
      BODY_TEXT="$TEXT_RICH <p>[<a href=http://twitpic.com/$ID>Twitpic</a>]</p>"
    
      # Format the post date correctly
      YEAR=`echo "$POST_DATE" | sed -e 's/[A-Z][a-z]* [0-9]*, //'`
      DAY=`echo "$POST_DATE" | sed -e 's/[A-Z][a-z]* //' -e 's/, [0-9]*//'`
      MONTH=`echo "$POST_DATE" | sed -e 's/ [0-9]*, [0-9]*//' | sed \
        -e 's/January/01/' \
        -e 's/February/02/' \
        -e 's/March/03/' \
        -e 's/April/04/' \
        -e 's/May/05/' \
        -e 's/June/06/' \
        -e 's/July/07/' \
        -e 's/August/08/' \
        -e 's/September/09/' \
        -e 's/October/10/' \
        -e 's/November/11/' \
        -e 's/December/12/' \
        `
      # Adjust the time to local midnight when west of GMT
      HOURS_LOC=`date | grep -Eo " [0-9]{2}:" | sed -e 's/://' -e 's/ //'`
      HOURS_UTC=`date -u | grep -Eo " [0-9]{2}:" | sed -e 's/://' -e 's/ //'`
      HOURS_OFF=`expr $HOURS_UTC - $HOURS_LOC + 7`
      echo "HOURS_LOC: $HOURS_LOC"
      echo "HOURS_UTC: $HOURS_UTC"
      echo "HOURS_OFF: $HOURS_OFF"
      if [ "$HOURS_OFF" -lt 0 ]; then
        # We're east of GMT, do not adjust
        HOURS_OFF=0
      fi
      if [ "$HOURS_OFF" -lt 10 ]; then
        HOURS_OFF=0$HOURS_OFF
      fi
      if [ "$DAY" != "" ] && [ "$DAY" -lt 10 ]; then
        DAY=0$DAY
      fi
      DATE_FORMATTED="$YEAR-$MONTH-$DAY-$HOURS_OFF:00"
      echo "DATE_FORMATTED: $DATE_FORMATTED" | tee -a $LOG_FILE
    
      echo "<p><img src='$FULL_FILE' alt='$TEXT' title='$TEXT' /></p>" >> $HTML_OUT
      echo "$BODY_TEXT" >> $HTML_OUT
      echo "  Post date: $DATE_FORMATTED; Count: $COUNT" >> $HTML_OUT
    
      # Upload this Twitpic data to Posterous
      if [ ! -z "$P_SITE_ID" ]; then
    
        # First make sure we're under the API upload limit
        if [ "$COUNT" -le "$UPLOAD_SKIP" ]; then
          echo Skipping upload...
          continue
        fi
        if [ "$COUNT" -gt "`expr $UPLOAD_SKIP + $P_API_LIMIT`" ]; then
          echo "Skipping upload due to daily Posterous API upload limit of $P_API_LIMIT."
          echo "To resume uploading where we left off today, supply UPLOAD_SKIP parameter of `expr $UPLOAD_SKIP + $P_API_LIMIT`."
          continue
        fi
    
        P_OUT_FILE="posterous-$P_SITE_ID-$ID.out"
        if [ -s "$P_OUT_FILE" ]; then
          rm "$P_OUT_FILE"
        fi
        echo "Uploading Twitpic image..."
        curl -u "$P_ID:$P_PW" "http://posterous.com/api/newpost" -o "$P_OUT_FILE" \
          -F "site_id=$P_SITE_ID" \
          -F "title=$TEXT" \
          -F "autopost=$P_AUTOPOST" \
          -F "private=$P_PRIVATE" \
          -F "date=$DATE_FORMATTED" \
          -F "tags=$P_TAGS_POST" \
          -F "source=burndive's Twitpic-to-Posterous script $SCRIPT_VERSION_STRING" \
          -F "sourceLink=http://tuxbox.blogspot.com/2010/03/twitpic-to-posterous-export-script.html" \
          -F "body=$BODY_TEXT" \
          -F "media=@$FULL_FILE"
        cat $P_OUT_FILE  | tee -a $UPLOAD_OUT
      fi
    done
    echo Done.
    CC-GNU GPL
    This software is licensed under the CC-GNU GPL version 2.0 or later.

    PS: If you use my code, I appreciate comments to let me know, and any feedback you may have, especially if it's not working right for you, but also just to say thanks.

    For convenience, you can download this script from my server.

    Saturday, March 13, 2010

    Posterous Blogger Sidebar Widget Thumbnail Feed Script

    It's been a while since this blog actually lived up to its name and I posted something to do with actual hacking on my Linux box.

    You may recall a post a while back where I used the 'sed' command to create a modified copy of my TwitPic feed so that a thumbnail would show up when I imported the feed into a Blog List gadget in Blogger.

    Well, I recently switched from using TwitPic for uploading pictures from my phone to using Posterous for uploading pictures and video from my phone.  There were many reasons in the "pros" column, but in the "cons" was the fact that, when I imported my feed into that same Blogger widget, no thumbnail appeared.

    So, just like with the TwitPic feed, I set out to modify my Posterous feed in order to get the thumbnail to appear.  One problem I encountered is that the feeds were totally different formats.  I based my TwitPic feed modification on a feed I knew to be working (from Digg), but performing that same transformation on the Posterous feed proved to be problematic.

    What I ended up doing was simply extracting the information I needed from the Posterous feed, and then creating a one-item feed in the known-good format.  The feed looks nothing like the original Posterous feed, but that's just fine, since all it will be used for is pulling the latest post into my blog sidebar.

    One improvement I'm considering working on is providing a useful thumbnail when I upload a video.  Currently (at least with the 3gp format), the Posterous feed just sticks a generic blank file icon in the thumbnail field.  What I would like is a still frame from the movie.  In order to do this myself, I would need to download the enclosure link, process the video into a still image, post the image on the web, and then put the image URL into the feed.  All very doable given the right tools.

    I'll have to test out what happens when I use the MP4 format for video, which my phone is also capable of creating.

    Here's my script (so far).  Feel free to use it under the terms of the license listed below.  If you have any questions or suggestions, please feel free to leave a comment.

    posterous.sh (run as an hourly cron job):
    #!/bin/sh
    
    # Copyright 2010 Tim "burndive" of http://burndive.blogspot.com/
    # This software is licensed under the Creative Commons GNU GPL version 2.0 or later.
    # License informattion: http://creativecommons.org/licenses/GPL/2.0/
    
    # This script was obtained from here:
    # http://tuxbox.blogspot.com/2010/03/posterous-blogger-sidebar-widget.html
    
    DOMAIN=$1
    FEED_DIR=$2
    FEED_TITLE=Posterous
    FEED_DESC="The purpose of this feed is to provide a thumbnail of the latest item in a Blogger sidebar widget."
    
    
    if [ -z $DOMAIN ]; then
      echo "You must enter a Posterous DOMAIN."
      exit
    fi
    
    if [ -z $FEED_DIR ]; then
      echo "You must supply a directory."
      exit
    fi
    
    if [ ! -d $FEED_DIR ]; then
      echo "You must supply a valid directory."
      exit
    fi
    
    FEED_URL="http://$DOMAIN/rss.xml"
    TMP_FILE="/tmp/posterous-$DOMAIN.xml"
    FEED_FILE="$FEED_DIR/posterous-$DOMAIN.xml"
    
    # Fetch the RSS feed
    wget -q $FEED_URL -O $TMP_FILE
    
    if [ ! -f $TMP_FILE ]; then
      echo "Failed to download $FEED_URL to $TMP_FILE"
      exit
    fi
    
    NEW_LATEST=`grep guid $TMP_FILE | head -n1`
    
    if [ ! -f $FEED_FILE ]; then
      FEED_LATEST="" 
    else 
      FEED_LATEST=`grep guid $FEED_FILE | head -n1`
    fi
    
    # Comment these out
    #echo "FEED_LATEST: $FEED_LATEST"
    #echo "NEW_LATEST : $NEW_LATEST"
    
    if [ "$FEED_LATEST" = "$NEW_LATEST" ]; then
    #  echo "There is no change in the feed."
    #  echo "FEED_LATEST: $FEED_LATEST"
      exit
    fi
    
    IMG_HTML=`grep -i "img src" $TMP_FILE | head -n1 | grep -Eo "<img src='[^']*'[^>]*>" | sed -e 's/\"/\&quot;/g' -e 's/</\&lt;/g' -e 's/>/\&gt;/g'`
    #echo "IMG_HTML: $IMG_HTML"
    
    IMG_URL=`grep -i "img src" $TMP_FILE | head -n1 | grep -Eo "http:[^']*" | tail -n1`
    #echo "IMG_URL: $IMG_URL"
    
    # Create a minimalist RSS feed
    echo "<?xml version='1.0'?> " > $FEED_FILE
    echo "<rss version='2.0' xmlns:media='http://search.yahoo.com/mrss/'>" >> $FEED_FILE
    echo "<channel>" >> $FEED_FILE
    echo "<title>$FEED_TITLE</title>" >> $FEED_FILE
    echo "<description>$FEED_DESC</description>" >> $FEED_FILE
    echo "<link>http://$DOMAIN/</link>" >> $FEED_FILE
    
    echo "<item>" >> $FEED_FILE
    grep "<title>" $TMP_FILE | head -n2 | tail -n1 >> $FEED_FILE
    grep "<pubDate>" $TMP_FILE | head -n1 >> $FEED_FILE
    echo "<description>$IMG_HTML</description>" >> $FEED_FILE
    grep "<link" $TMP_FILE | head -n3 | tail -n1 >> $FEED_FILE
    echo "$NEW_LATEST" >> $FEED_FILE
    echo "<media:thumbnail url=\"$IMG_URL\" height=\"56\" width=\"75\" />" >> $FEED_FILE
    echo "</item>" >> $FEED_FILE
    
    echo "</channel>" >> $FEED_FILE
    echo "</rss>" >> $FEED_FILE
    
    # Cean up
    rm $TMP_FILE
    
    CC-GNU GPL
    This software is licensed under the CC-GNU GPL version 2.0 or later.

    Sunday, February 28, 2010

    Facebook Gmail Phone Filter

    The other day I had an idea that I think is worth sharing. 

    I post to Twitter, but most people who see those posts don't see them via Twitter, they see them when the tweets are imported to Facebook as status updates. 

    When someone responds to your post on Twitter, you get an SMS with their reply.  When someone responds to my post from Facebook, which is where the vast majority of responses and reactions occur, I don't get notified on my phone, which is usually where I sent the original message from.  Often I'm nowhere near my computer, and won't be for hours.

    This means that I don't see the response until I check my e-mail (or Facebook, but e-mail is usually first).  I have Facebook configured to send me a message when someone responds to my posts.  It occurred to me that I could get those same notifications on my phone.  Here's how.

    I set up a filter in Gmail that forwards matching e-mails to my phone's multi-media message (MMS) e-mail address. 

    Here's what the filter looks like.

    Here's the first step in creating the filter.  I'm also forwarding Facebook messages to my phone.  If I were to leave off the word "your" and just say "commented on" then the filter would include comments on other people's posts that I had previously commented on.

    Here's the second step.  The MMS e-mail address is the address that appears on an e-mail if I send an MMS message (e.g., a picture) from my phone to my Gmail address.
    And that's it.  When someone responds to my Twitter/TwitPic posts from Facebook, I get the message on my phone right away.  Since it's an MMS and not an SMS, the messages are not limited to 160 characters.  I have a messaging plan with AT&T that doesn't distinguish between the two kinds of messages.

    Friday, February 12, 2010

    Google Buzz Kill

    For the past few days the Internet has been all aflutter about Google Buzz, some saying it's a Twitter killer.  Google Buzz is not like Twitter.  Rather, it is like FriendFeed.  I have used FriendFeed for quite some time to aggregate all of my online content into a single stream, and Google Buzz is designed to do exactly the same thing.

    Like FriendFeed, Google Buzz consumes Twitter and other content-generators, that is, you can have your Twitter posts show up on either service, as well as you blog posts, your online photos, forum comments, and so forth. Content originates in multiple places, but these services enable it to all come together in one place specific to the person who created it.

    Now, I have no problem with Google creating their own FriendFeed and then foisting it on all Gmail users.  I think it's a great idea.  My mother, for example, will never set up an account with FriendFeed, and she hasn't quite figured out Google Reader, but she might just try out this Buzz thing in her Gmail inbox, there she might see my latest tweet, or blog post, or photo album, or shared article. 

    Now, some of this stuff she already sees, since I import my Twitter updates and blog posts into Facebook, and so in a way, Google Buzz is competing with Facebook.

    Online Identity

    When you activate Buzz in your Google account, they let you know that they are making your Google Profile public, and that that includes your first and last name. 

    As it happens, I have gone through the trouble of NOT directly associating any of my public online content with my real name.  That way if you "Google" my name, you don't find all of my content (insert horror story here about prospective employers finding something they don't like or disagree with). 

    My real name is of course associated with my content inside of Facebook, but that content-name link is only available to my friends.  Most of the same content is available outside of Facebook, but it is tied to "burndive", not my name.

    Google's corporate mission is "to organize the world's information and make it universally accessible and useful".  This is no doubt why they are pushing for people to publicly link their full real name with all of their online content.  

    Well, I'm not going to be pushed.

    For many people who do not maintain a barrier online between their friends and the public, this will not be an issue, but for me it is.

    My Google account is used as my primary e-mail address.  I want my name to be associated with my e-mail address to my contacts, so I can't simply change my name to a pseudonym on my Google Profile, and it would be extremely disruptive for me to switch to another Google account. 

    Google is obviously aware of people in my situation, because they already have a feature in the Google Profile called a "nickname".  Anyone on my contacts list will see my real name on my profile, everyone else will see my nickname.  This is how it works with Google Reader shared items, and it's a very good system.  They just don't want to use it with Google Buzz.

    The Problem

    I went ahead and added my blogs, Google Reader, my Twitter account, and my Picasa Web account to Google Buzz, but nothing was being imported except Google Reader. 

    I looked further into the matter, and it turns out that it wasn't importing my content because after signing up for Buzz, I realized what had happened, and had restored my profile privacy settings.  "That's logical", I thought, "They won't let me post publicly because my name isn't public.  I'll just change the import settings so only my friends and family see the posts.  They can already see my name."  No dice.

    So what was up with Google Reader?  Google Reader has separate privacy settings, as it turns out, but, as I discovered, it will STILL share your full name on the posts and make it visible to the world.

    So, after a brief stint, I have turned off Google Buzz.  I never really intended to consume content there, but I had hoped it would be a venue for others to consume my content who would otherwise not occasion to see it, and a user-friendly comment forum.
    Thursday, January 28, 2010

    Firefox Extensions Collection

    A while ago, I wrote a post in which I create a list of software to install on a new Windows box.  I did this mostly for my own reference, but it might be useful to others.

    The first item on my list is Firefox, but (until now) I didn't include any extensions.  Firefox is all about customizations, and extensions are the most powerful way to customize it.  But who wants to go through the trouble of sorting through the thousands of extensions to find the useful ones?  Well, it's more a matter of keeping your ear to the ground and trying out the ones that sound good and/or come recommended.

    After years of research, I've created a collection of extensions!  I didn't write any of them, I just bunched them together because they were all useful to me.

    I plan on updating the collection as time goes on, so here's the link:
    You can choose to install them individually, or as a group.  I hope you find them as useful as I have.

    Wednesday, January 13, 2010

    Dropbox: File Synchronization

    Ever since we got our second computer (back in 1998, I believe), I have been dealing with the problem of how to keep my files in sync between multiple computers.  Initially, I simply didn't, or I used floppy disks to move files back and forth.  Then I bought an Ethernet hub, and used windows shares to pass the data back and forth.  When I bought a CD burner, I would periodically create snapshots of the family's files.

    Over the years, I have had many hard drives crash, and many more clean installs.  Solving the file sync problem is often best accomplished in conjunction with backing up those files.

    Until recently, I still basically used the LAN solution:  Keep two copies of my files on different computers, and periodically (or sporadically) copy one set of files over the other.  Of course, if you do it this way, you can never change your directory structure, or you have duplicates, and when you try to clean up the duplicates, you lose files.

    I also back up important files weekly to an external drive, and I keep four weekly backups, plus six monthly backups.  This process is automated thanks to a customized version of a backup script and some cron jobs on my Linux box.  This part hasn't changed.

    Recently, however, I discovered a handy little service called Dropbox.  Dropbox will back up your files, keep them in sync on all of your computers (2 GB for free, pay for more), and enable you to share them with other users if you choose.  I've tried Windows Live Mesh, and I still might use that for remote login, but Dropbox gives you more free storage space, and it is able to sync files from one computer to another over a local LAN (which saves ISP bandwidth).  Also, Dropbox supports Linux, which is a must for me.

    [Note: if you want to sign up, use my Dropbox referral link an we'll both get an extra 250MB of free space.]

    Dropbox enables some pretty cool syncing tricks if you're willing to roll up your sleeves at the command line.  Here are a few things I'm doing:
    • The Linux client for Dropbox treats symlinks to folders as if they were just folders.  Initially, I didn't like this, because it meant I couldn't just plop my existing file structure in place (because it contained symlinks to large data sets in other locations).  Also, I didn't want certain directories synced.  My solution was to simply link to the things I want to sync from my Dropbox folder.  That way, I can structure my directories any way I want, and cherry-pick the things I want to sync from that structure.


    • I use the Pidgin client for all my Instant Messaging accounts on Windows and Linux.  Pidgin logs all of my conversations, and saves them to a local folder.  Whenever someone IMs me or I open a chat window to IM someone else, the chat window is automatically populated with the latest conversation with that person from the chat log history.  In order to synchronize these logs between computers I created a symlink in the Dropbox folder to the logs folder on my Linux box.  In order to get my Windows pidgin accounts to use this folder, I created a folder "Junction" within the Pidgin AppData folder (.purple) using the command: "mklink /J".


    • I use DVRMSToolbox along with ShowAnalyzer to automatically find and skip commercials in Windows Media Center.  ShowAnalyzer is run on our living room media PC, and that is where the files are stored that tell the DTBAddin component where the commercials are within a given recorded TV file.  (If you're interested in setting this up yourself, see this guide.)  Normally, I would have to periodically copy new files in the CommercialsXml folder from C:\Public\Users\DvrmsToolbox on the media PC to my laptop in order for my laptop to know when to skip a commercial.  Now, the files are synced automatically, and I don't have to think about them.  I just open my laptop, fire up Media Center, and select the show I want to watch.  It's a pretty sweet setup.